Managing a chronic condition like eczema can make you feel like you’re not in the driver’s seat of your own health. The constant need to react to flare-ups can be exhausting. Using at-home phototherapy for atopic dermatitis is about taking back control. It allows you to proactively and consistently manage your skin on your own schedule, creating a sustainable routine that fits your life. This isn’t a DIY wellness trend; it’s a prescribed medical treatment that you undertake in partnership with your doctor. Together, you create a personalized plan that empowers you to manage your symptoms effectively for the long term.
Key Takeaways
- It works by calming your skin’s immune response: At-home phototherapy uses a specific type of light, narrowband UVB, to directly reduce the inflammation that causes eczema flare-ups, offering a targeted way to manage your symptoms.
- Partner with your doctor for a safe treatment plan: This is a medical treatment, not a DIY gadget. A prescription for an FDA-cleared device is required to ensure you get the correct light dosage and a schedule tailored to your skin, which is the safest way to get results.
- Success comes from consistency and the right tool: The best results happen when you stick to the treatment schedule your doctor creates. Choosing the right device for your needs—like a handheld unit for small spots or a larger panel for widespread eczema—makes it much easier to build and maintain that routine.
At-Home Phototherapy for Atopic Dermatitis: What to Know
Living with atopic dermatitis, or eczema, often means searching for effective ways to manage flare-ups. While creams and medications are common, at-home phototherapy is gaining ground as a convenient and powerful option for those with moderate to severe symptoms. This treatment uses a specific type of ultraviolet (UV) light to reduce inflammation and give your skin a chance to heal, all from the comfort of your home. But how exactly does light therapy work on eczema, and are all types of UV light the same? Let’s break down what you need to know about this approach.
How Narrowband UVB Light Calms Inflammation
When your skin flares up with eczema, it’s because your immune system has gone into overdrive, causing that frustrating inflammation and itchiness. Narrowband UVB (NB-UVB) phototherapy works by directly addressing this. The light penetrates the skin and helps to calm down the immune system right where the problem is. It specifically reduces the number of inflammatory cells, called T-cells, that are responsible for the eczema reaction. Think of it as a reset button for the overactive immune response in your skin, helping to soothe irritation and reduce the constant need to scratch. This targeted action is what makes it an effective treatment for persistent eczema.
Narrowband vs. Broadband UVB: What’s the Difference?
You might hear about two types of UVB light used for phototherapy: narrowband and broadband. While they sound similar, there’s a key difference. Broadband UVB is an older form of light therapy that uses a wider range of UV light wavelengths. Narrowband UVB, on the other hand, uses a very small, specific part of the UV light spectrum. This precision is why many clinicians now prefer it. Clinical evidence shows that narrowband UVB is generally more effective at treating skin conditions like eczema and comes with fewer potential side effects. It’s one of the innovative treatment options that offers a more targeted approach to managing chronic inflammation.
Does At-Home Phototherapy Actually Work for Eczema?
It’s a fair question. When you’re dealing with the persistent itch and discomfort of eczema, you want to know that a treatment is worth your time and effort. The short answer is yes, at-home phototherapy can be a highly effective tool for managing atopic dermatitis. While light therapy has been a trusted treatment in clinics for years, the ability to do it from the comfort of your own home has made it a more practical and sustainable option for many. But you don’t have to take our word for it—the clinical evidence speaks for itself.
A Look at the Clinical Evidence
Let’s look at what the science says. A recent study on at-home phototherapy gave patients with stubborn eczema a handheld narrowband UVB device to use for 12 weeks. The results were impressive. After the treatment period, two-thirds of the participants saw their eczema get better overall. Nearly half reported that at least one of their treated patches of skin was “Clear” or “Almost Clear.” Even more telling, over a quarter of them said all of their treated areas had cleared up. Patients were also very happy with the experience, giving it a high satisfaction rating. This shows that at-home treatment isn’t just a convenient alternative; it’s a powerful and promising option for getting lasting relief.
Creating a Treatment Schedule for the Best Results
Consistency is your best friend when it comes to phototherapy. Think of it less like a one-time fix and more like a routine that gently calms your skin over time. In the study mentioned above, patients treated their skin three times a week. General home phototherapy protocols often follow a similar pattern, typically recommending a few sessions per week, never on back-to-back days. The exact frequency and duration of your sessions, however, are unique to you. This is why working with your doctor is so important. They will create a personalized treatment plan that outlines your starting dose and schedule, ensuring you get the best possible results safely.
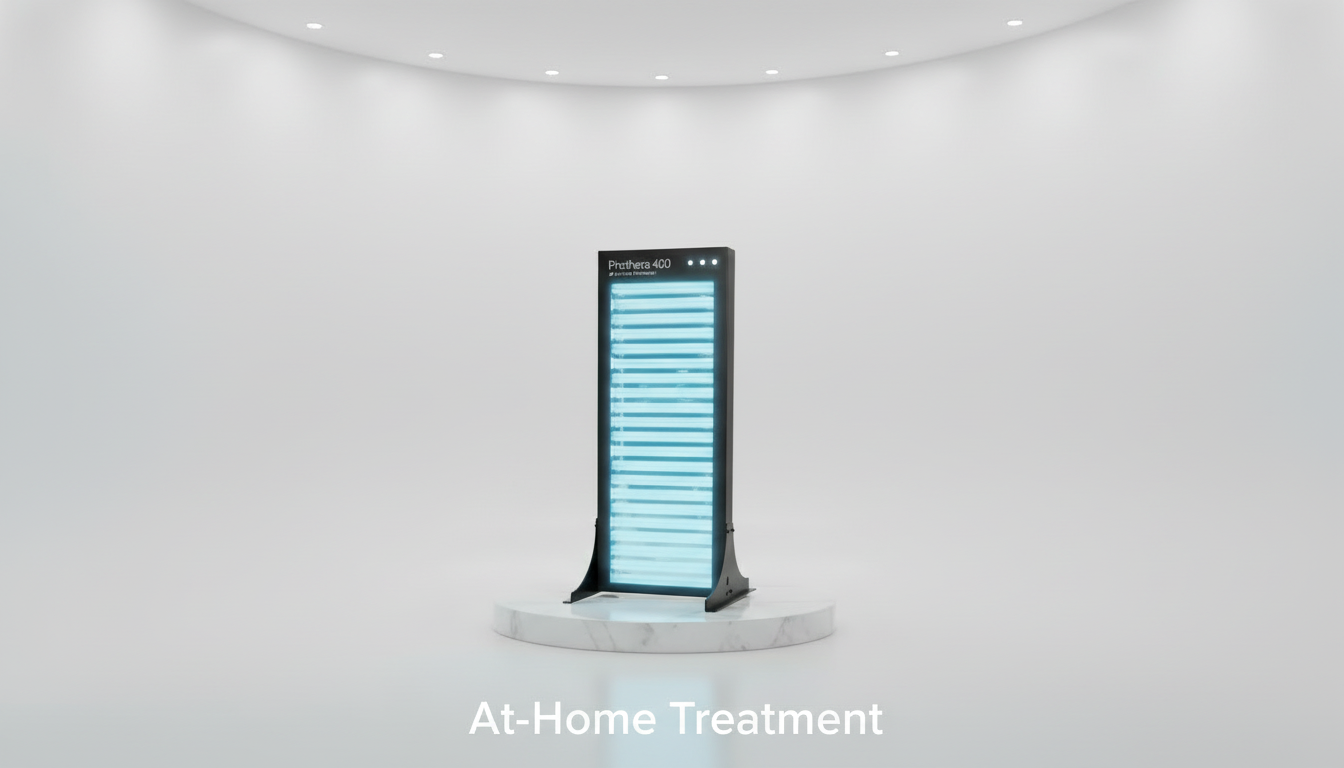
What Kinds of At-Home Phototherapy Devices Are There?
If you’re considering at-home phototherapy, you’ll find that the devices come in a few different shapes and sizes. The best one for you really depends on how much of your skin needs treatment. Think of it like this: you wouldn’t use a tiny paintbrush to paint a whole wall. Similarly, the device you choose should match the scope of your atopic dermatitis.
Home phototherapy uses a medical device to deliver special ultraviolet (UV) light to treat skin conditions right from the comfort of your home. Let’s look at the main types of devices available, from small, targeted tools to larger panels designed for more widespread coverage. Understanding your options is the first step toward finding a treatment plan that fits your life and your needs.
Handheld Devices for Targeted Relief
For those dealing with eczema on smaller, specific areas—like your hands, feet, or the crooks of your elbows—a handheld device can be a great option. These are compact, portable units that you can easily hold and direct at a specific patch of skin. They’re designed for precision, allowing you to treat one area without exposing the surrounding skin. Some people also use tabletop devices, which are a bit larger than handhelds but still focus on treating smaller sections of the body. This targeted approach is perfect if your atopic dermatitis is localized and you don’t need to treat large surface areas.
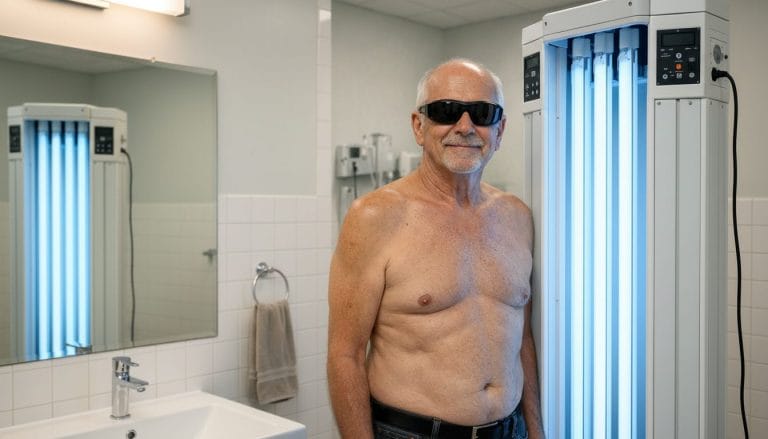
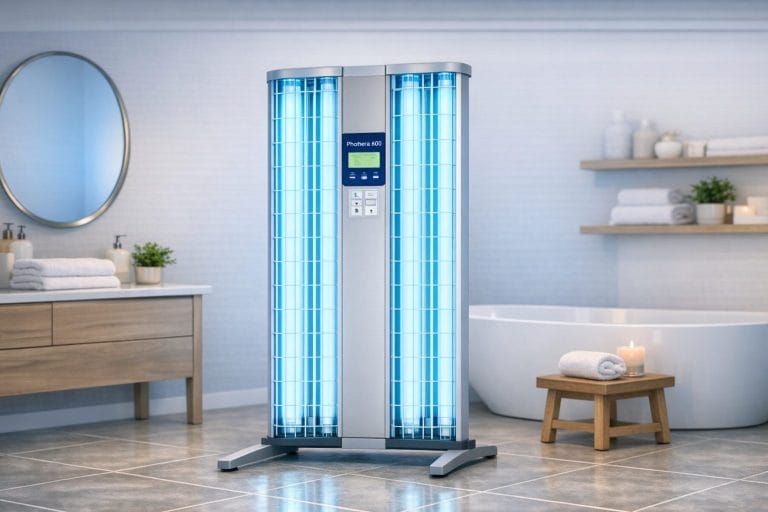
Light Panels for Larger Areas
When atopic dermatitis covers more ground, like your back, legs, or torso, treating it with a small handheld device would take forever. That’s where light panels come in. These larger units are designed to treat widespread eczema more efficiently. You can find everything from medium-sized panels that stand on the floor to full-body, cabinet-like units. These devices allow you to treat a significant portion of your body all at once, ensuring you get consistent and even light exposure across all affected areas. This makes them a practical choice for anyone with moderate to severe eczema that isn’t confined to just one or two spots.
Why FDA-Cleared Devices Are a Must
This part is incredibly important: only use an FDA-cleared phototherapy device. In the United States, you need a doctor’s prescription to buy a legitimate home phototherapy system, and for good reason. FDA clearance means the device has been reviewed for safety and effectiveness. You might see unregulated devices for sale online, but their safety and performance are completely unknown. Using an unverified device could be ineffective at best and harmful at worst. Working with your doctor ensures you get a reliable device and a treatment plan tailored to you, which is central to our approach for providing innovative treatment options.
The Pros and Cons of At-Home Phototherapy
Bringing medical treatments into your home can feel like a big step, but for many, it’s a game-changer. At-home phototherapy offers a way to manage chronic conditions like atopic dermatitis on your own terms. Like any treatment, it has its benefits and potential downsides. Understanding both sides helps you and your doctor decide if it’s the right path for you. The key is balancing the convenience and effectiveness with the safety protocols required to get the best results. When done correctly under medical supervision, it can be an incredibly empowering tool for managing your health.
The Upside: Convenience and Long-Term Savings
One of the biggest wins for at-home phototherapy is convenience. Instead of scheduling your life around multiple weekly trips to a clinic, you can complete your treatment in the comfort of your own home. This flexibility makes it much easier to stick to your treatment plan consistently, which is crucial for seeing results. Over time, treating at home can also be more cost-effective than paying for repeated in-office sessions. Studies have shown that home phototherapy can be just as effective as clinic-based treatments for conditions like psoriasis, offering a practical and efficient way to manage your skin without disrupting your life.
The Risks: Potential Side Effects and How to Manage Them
Because phototherapy uses UV light, it’s important to be aware of the potential risks. The most common side effects are similar to a mild sunburn, including temporary skin redness, itching, or dryness. In one study, about 36% of people experienced some redness, but more severe reactions like blistering were rare. Long-term, improper use of UV light can contribute to premature skin aging and increase the risk of skin cancer. This is why following your doctor’s instructions precisely is so important. You should also tell your doctor about every medication you take—even over-the-counter ones—as some can make your skin more sensitive to light and require adjustments to your treatment plan.
Debunking Myths About At-Home Treatment Safety
A common concern is whether phototherapy can be done safely at home. The answer is yes, but with a major condition: it must be supervised by an experienced doctor using a regulated medical device. Your doctor’s oversight ensures you’re using the correct dosage and frequency for your specific needs. You should never buy a phototherapy device online without a prescription, as its safety and effectiveness are unverified. With proper training and a high-quality, FDA-cleared device, patients can confidently and safely manage their treatment. This approach makes innovative treatment options accessible while prioritizing your well-being and ensuring you get the best possible outcome.
Why You Need a Doctor’s Guidance for At-Home Phototherapy
Bringing phototherapy into your home can be a game-changer for managing your autoimmune condition, offering convenience and consistency that’s hard to get with in-office visits. But it’s important to remember that this is a medical treatment, not a wellness trend. Using a powerful, FDA-cleared light therapy device requires a partnership with a healthcare provider who understands your specific needs.
Think of your doctor as your co-pilot. They’re there to map out a safe and effective route, help you understand the controls, and make adjustments along the way. Their guidance ensures that you’re not just using the device correctly, but that you’re using it in a way that’s tailored to your body and your health goals. This collaboration is the key to getting the best possible results while keeping you safe. It’s about combining the power of medical technology with the wisdom of expert medical care to create a truly personalized treatment plan.
The Role of a Prescription in Your Treatment Plan
You might wonder why you can’t just order a phototherapy device online like you would a new lamp. In the United States, medical-grade phototherapy systems require a prescription, and for good reason. A prescription is your doctor’s official recommendation that this treatment is appropriate for you. It’s the first and most important step in ensuring your safety and setting you up for success.
Before writing a prescription, your doctor will evaluate your overall health, skin type, and the specifics of your condition. This process confirms that you’re a good candidate for light therapy and helps rule out any potential risks. The prescription connects you to innovative treatment options that are backed by clinical evidence and ensures the device you receive is a legitimate, FDA-cleared medical tool designed for therapeutic use.
Getting the Dose Right: Safety Protocols and Device Features
When it comes to light therapy, the “dose” is everything. This refers to the intensity of the light and the duration of your exposure. Too little light won’t produce results, while too much can lead to skin irritation or burns. This is where your doctor’s expertise is crucial. They will create a precise treatment protocol that specifies how long your sessions should be and how often you should have them.
An experienced provider must oversee your treatment, which is why all reputable at-home devices are designed to be used under medical supervision. Modern, prescription-only units come with critical safety features, such as key-locked controls to prevent accidental use and timers that your doctor can help you set. These features give you and your provider control over the treatment, ensuring each session delivers the exact dose needed.
Why Regular Check-Ins and Adjustments Matter
Your phototherapy journey doesn’t end once you have your device and your starting dose. Your body’s response to treatment is unique, and it can change over time. That’s why regular check-ins with your doctor are a non-negotiable part of the process. These appointments allow your provider to carefully monitor your progress, assess how your skin is reacting, and check for any side effects.
For example, a typical treatment schedule might involve using the device three times a week for several weeks to see initial results. Based on your feedback and their observations, your doctor can fine-tune your protocol. They might adjust the session duration or frequency to maximize benefits and minimize risks. This ongoing dialogue ensures your treatment plan evolves with you, helping you achieve the best long-term outcomes safely.
How to Choose the Right Phototherapy Device for You
Once you and your doctor decide that at-home phototherapy is a good fit, the next step is finding the right device. This isn’t like buying a standard home appliance; you’re choosing a piece of medical equipment that will become part of your health routine. Thinking about a few key factors will help you select a device that is safe, effective, and right for your specific needs. It’s about finding a tool that empowers you to manage your symptoms confidently from the comfort of your home.
What to Look For: FDA Clearance and Key Specifications
The very first thing to check for is FDA clearance. This is non-negotiable. FDA clearance means the device has been reviewed for safety and effectiveness, so you can trust that it performs as expected. Because these are medical-grade tools, you will also need a prescription from your healthcare provider to purchase one. This ensures that at-home phototherapy is the right choice for your condition and that you have professional guidance. Think of it less as a hurdle and more as the first step in a safe and personalized treatment plan, which is why we offer innovative treatment options that are always prescribed by a care provider.
Essential Safety Features and Treatment Capabilities
A quality phototherapy device should come with built-in safety features designed to protect you. Look for units with key-locked switches to prevent accidental use, especially if you have children at home. Another critical feature is a timer that your doctor can help you set, along with an automatic shut-off. This prevents overexposure, which is crucial because UV light carries potential risks if not used correctly. These features aren’t just nice to have; they are essential for making your at-home treatment as safe as it is in a clinic. They give you and your doctor precise control over every session, ensuring you get the benefits without the guesswork.
Our Approach: Why We’re Prescription-Only
We believe that at-home phototherapy should always be done under a doctor’s care. That’s why our devices are only available with a prescription. This approach ensures you have a partner in your health journey who understands your unique needs. Your doctor will determine the right dosage and frequency for your sessions and can help you make adjustments along the way. Having your treatment monitored by an experienced doctor is the best way to manage potential side effects and achieve the best possible results. A prescription isn’t a barrier—it’s a bridge to safe, effective, and personalized care that puts your well-being first.
Your Safety Checklist for At-Home Treatment
Bringing your treatment home gives you incredible flexibility, but it also means you’re in the driver’s seat when it comes to safety. Think of this as your pre-treatment checklist. Running through these steps before each session will help you get the best results while keeping your skin protected and healthy. It’s all about creating a routine that is both effective and secure, so you can focus on what matters most—feeling better.
How to Set Up a Safe Treatment Space
Home phototherapy involves using a medical device that emits a specific wavelength of ultraviolet (UV) light to calm inflammation in your skin. To get started, designate a private, comfortable space for your sessions where you won’t be interrupted. Make sure your device is on a stable, flat surface and that you have enough room to position yourself correctly, whether you’re treating your hands or a larger area. Always follow the specific setup instructions that come with your device, as each one is slightly different. This dedicated space will help you get into a consistent and safe treatment rhythm.
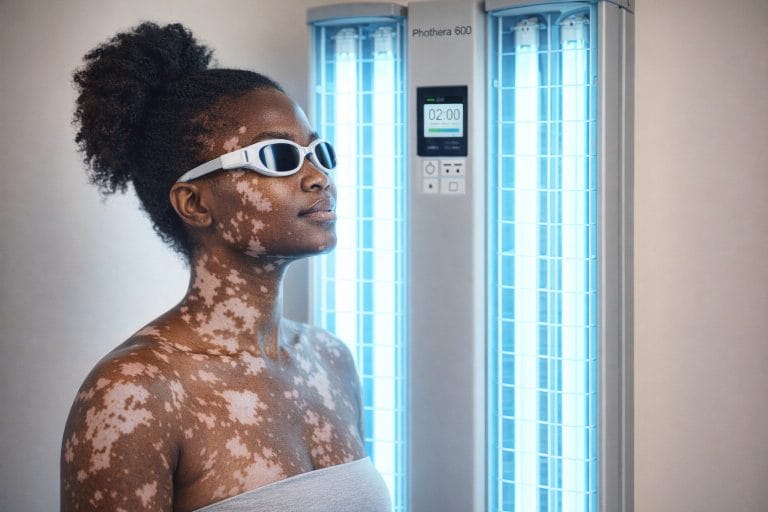
Protecting Your Eyes and Monitoring Your Skin
Your eyes are sensitive, so protecting them is non-negotiable. Always wear the UV-blocking goggles that come with your device for the entire duration of your treatment. It’s also important to keep a close eye on your skin. A little bit of pinkness after a session can be normal, but if you notice any significant redness, blistering, or discomfort, let your doctor know right away. Modern, FDA-cleared devices come with built-in safety features like precise timers and controlled outputs to deliver the exact dose prescribed by your doctor, which helps prevent overexposure and keeps your treatment on track.
What to Avoid: Sun Exposure and Medication Interactions
Your phototherapy sessions are a prescribed medical treatment, not a trip to the tanning salon. During your treatment course, it’s crucial to avoid extra sun exposure. That means skipping the sunbathing and being diligent with sunscreen when you’re outdoors. Combining your prescribed UV light therapy with natural sunlight can lead to burns and skin damage. You should also keep an open line of communication with your doctor about all medications and supplements you’re taking. Some can make your skin more sensitive to light, so your doctor needs the full picture to ensure your treatment plan remains safe and effective.
How to Create a Treatment Routine That Works
Starting at-home phototherapy is a big step toward taking control of your health. But like any effective treatment, the real magic happens with consistency. Simply having the device isn’t enough; building a routine you can stick with is what will ultimately lead to the results you’re looking for. Think of it less as a strict regimen and more as a new, empowering habit. Working with your doctor, you can create a simple, sustainable plan that fits into your life and helps you manage your symptoms for the long haul.
Find Your Rhythm: Setting a Consistent Schedule
Consistency is the cornerstone of successful phototherapy. Your doctor will give you a personalized treatment plan, but a typical schedule often involves sessions three to five times per week. For example, guidelines for home phototherapy often suggest this frequency to clear skin conditions, with a reduced schedule for maintenance once symptoms improve. The key is to find a rhythm that works for you. Try linking your treatment to an existing daily habit, like doing it right after you brush your teeth in the morning or while you listen to a podcast in the evening. Making it a predictable part of your day removes the guesswork and helps you stay on track without feeling overwhelmed.
How to Track Your Skin’s Progress
Tracking your progress is a powerful way to stay motivated and help your doctor fine-tune your treatment. It can be hard to notice small, gradual changes day-to-day, but documenting them makes your progress tangible. A simple way to do this is by taking weekly photos of the treatment area on your phone. You can also keep a small journal to jot down notes about your symptoms—is the itching less intense? Is the redness fading? This log provides valuable feedback for your check-ins. A recent study on at-home phototherapy for eczema found that after 12 weeks, 67% of patients saw an overall improvement, showing that consistent treatment delivers measurable results over time.
Why Sticking With It Is Key to Seeing Results
It can be tempting to skip a session here and there, but adherence is directly linked to success. In that same study, the overall rate of patients who used their device as directed was 73%—and their results reflect that commitment. When you stick to the plan your doctor prescribes, you give the therapy the best possible chance to work. It’s also encouraging to know that patients are generally very happy with this approach, reporting an average satisfaction score of 4.43 out of 5. Seeing it through isn’t just about managing symptoms; it’s about investing in your long-term well-being and finding a sustainable way to feel better in your own skin.
Related Articles
- Phototherapy – Safe & Effective Treatment for Psoriasis & Eczema
- Home Phototherapy – Cytokind
- Phototherapy Definition: A Guide to Light Therapy
- The Phototherapy Procedure: What to Expect
- Your Guide to Safe UVB Light Therapy at Home
Frequently Asked Questions
How long will it take before I see my eczema improve? Patience and consistency are your best allies here. Phototherapy works gradually to calm your skin, so you likely won’t see a dramatic change overnight. While every person’s skin responds differently, clinical studies often track progress over several weeks. For example, one study saw significant improvement after 12 weeks of consistent use. The key is to stick with the schedule your doctor creates for you, as regular sessions are what lead to lasting results.
Is using a phototherapy device the same as using a tanning bed? Absolutely not. This is a critical distinction. Tanning beds use a broad spectrum of UVA and UVB light with the goal of tanning the skin, which is a sign of skin damage. Medical phototherapy devices use a very specific, narrow wavelength of UVB light that is clinically proven to reduce inflammation. Think of it as a targeted medical tool versus an uncontrolled cosmetic device. They are not interchangeable, and a tanning bed should never be used to treat a medical condition.
What does a phototherapy session feel like? Does it hurt? A typical session should be a pretty neutral experience. Most people report feeling a gentle, mild warmth on their skin during the treatment, but it should never be painful or uncomfortably hot. The sessions are also quite short, often lasting just a few minutes. If you ever feel any burning or significant discomfort, you should stop the treatment immediately and consult with your doctor, as your dose may need to be adjusted.
Do I still need to use my regular moisturizers and topical creams? Yes, you should think of phototherapy as one important part of your overall skin health plan, not a replacement for everything else. Keeping your skin hydrated is crucial when managing eczema, so continuing to use your moisturizers is a great idea. Your doctor will give you specific guidance on how to combine light therapy with any prescription creams you use to make sure you get the best results from both treatments.
Can I just buy one of these devices online without a doctor? You should never purchase a phototherapy device without a prescription. In the United States, any legitimate, FDA-cleared home phototherapy system requires one, and this is for your own safety. A prescription ensures that a doctor has properly diagnosed your condition, confirmed that light therapy is right for you, and created a personalized treatment plan with the correct dosage. Unregulated devices sold online have no guarantee of safety or effectiveness and could potentially harm your skin.